Setting up an online store really isn’t difficult anymore. You can be up and running within a day – or let’s say that you can build your online store in a weekend.
I recently went through this exercise when I wanted to separate the Q-Linn product range from the general Horses-Store.com website. I want to be able to offer Q-Linn to a wider audience as the bras are so good – and not just for horse riding. Keeping it under the horses-store.com website would be confusing.

Step 1 – Find a web address
After I had the formal approval from the brand owner (I import Q-Linn lingerie from The Netherlands so it’s not my own product) I went to GoDaddy.com and registered the q-linn.com.au website.
I prefer GoDaddy personally as it’s cheap – I never add the hosting and other services so it’s only the domain name registration.

Step 2 – Choose a sales Platform
This is where you need to choose: Do you want a wordpress website with Woo Commerce so you can sell items online? Or do you prefer to have an ecommerce solution?
I have used both options and if I want to start an online store I now choose for the ecommerce solution. It’s so much easier, and less things to worry about.
The two main players I see are: Shopify and BigCommerce.
Shopify
This is a Canadian company and their ecommerce platform is super easy to work with. The layout is very intuitive. They offer a 14 day free trial which is great if you want to try out a few different options before you commit.
There are a couple of things you need to be aware of with Shopify:
- When you choose their cheapest option (US $29 per month) you will also pay 2% transaction fee for every transaction you process through your online store. You ALSO have to pay 1.75% +$0.30 in credit card fees for every transaction you process through your store.
For a $100 transaction your fees will be $2 + $1.75 + $0.30 = $4.05.
Unless you use Shopify Payments, which uses Stripe, in which case you don’t have to pay the 2% transaction fees.
 89.95 – $0.30 – $1.43(1.6%)= $88.21
 - Not everything is built-in with Shopify, and in no time you will be looking for additional add-ons to your store. Shopify has a market place for these Apps.
Some are free, but most are paid. All these add ons can add significantly to your monthly bill so be aware of what you want to achieve. To give you an idea, I’m on the $79 per month plan with Horses-Store but my monthly invoice is $130 because of the apps I’ve included.
 89.95 – $0.30 – $1.43(1.6%)= $88.21
Other than that it is super easy to work with and the customer service team is friendly and always willing to help.
BigCommerce
This is an Australian company , based in Sydney, but the monthly fees are also in USD.
Their entry level plan is US$29.95 but in comparison with Shopify it’s a lot more complete.
Biggest bonus is that you don’t have to pay transaction fees.
Personally, I find the dashboard layout more confusing than the one in Shopify. I am looking for stuff all the time. (For example – where are the customer feedback comments?) However, the Knowledge base and Customer Service is pretty good so you will be able to find the answer fairly quickly.
I like the fact that Australia Post shipping is integrated with Big Commerce so you are never out of pocket with shipping.
I’ve compared these two ecommerce platforms like this in the past: Shopify is like Apple computers – plug and play and intuitive but more expensive. BigCommerce is like Windows machines; they work but you need to learn how to use them.
Decision: do you need a Point of Sale App?
Both Shopify and BigCommerce offer a point of Sale app as part of their software. Both are free and will save you heaps of time and frustration.
Shopify uses their own Point of Sale System and BigCommerce uses Square. To be honest, I haven’t used the BigCommerce system yet as I haven’t had the need yet for the Q-Linn product range.
The Shopify app works fantastic on your iPad. Biggest plus for me is that every time you go to a market, or have a pop up store somewhere, the sales are tracked via the shopify system and stock levels are automatically updated. No more manual entries at the end of the day… YAY!
Step 3: Find a website theme
Now that you’ve chosen your platform (wordpress, Shopify or Bigcommerce) you need to find a theme that shows your personality / brand image.
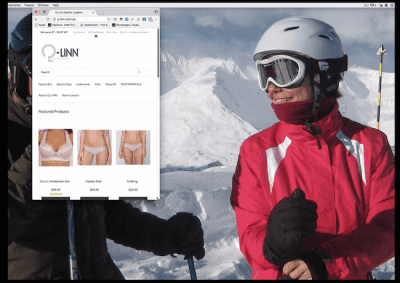
As most people browse on their mobile devices (phone & tablet) you need to look for a responsive theme. This means that the layout of the website is adjusted automatically based on the screen size. Your site will always look good with a responsive theme. See the example of http://q-linn.com.au below:
- Payment.
If you have a merchant facility already set up (for example with eWay or your bank) you can use their settings in your online store as well.
If you don’t have a merchant facility you may want to use Paypal or Stripe. Both these systems are free to set up and charge you a fee for each transaction.
You can find more information at http://paypal.com.au and http://stripe.com/au - Shipping.
How much are you going to charge for shipping? You can choose for Free shipping, or a flat fee for all orders or you can choose an amount per weight or order size.
For my business I use Australia Post as the preferred shipping option because a lot of my clients live outside of metro areas. However – if your clients are all within a city area you may also want to look at sendle.com as they work specifically with small businesses.
Taxes.
Don’t forget to set up your 10% GST. Are your prices inclusive of GST or do you prefer to show the ex. GST prices on your site but add the GST during checkout? Both options work in different industries – just don’t forget to set this up. - Checkout / Customer accounts
Do you want to force people to create accounts before they can purchase from your site? Or are you OK with guests? You need to make a choice… easy. - Sales Channels.
Where do you want to sell? Do you want to link your ecommerce store to your Facebook fanpage? Or do you wan to link you BigCommerce store to eBay? That’s possible… but you need to consider if that’s required. My recommendation would be to start small and grow later. Adding more sales channels also adds complexity. - Notifications.
Check the emails that are sent to your clients. Does it look good? Do you need to add your logo or make changes to the content of the email? Do it now before your shop goes live.
Step 5: Store Design
Now that the store is set up to do the right thing we can move on to the overall look and feel of the site.
Customise your theme by adding logos, headlines, taglines and favicons.
A favicon is that little image you see in the tab of your browser. It’s a little 16px by 16px image that you upload into the store.
A couple of items that you MUST NOT forget:
- Add pages – add pages for your privacy policy, your returns and shipping policy, your customer service policy, your ‘contact us’ page, testimonials / client feedback, About us / company history / our story.
- Show these pages in the navigation of your website. And remember – often these pages are pre populated with dummy texts so make sure you go through each and every one of the pages to make sure that they show YOUR text. Nothing screams ‘amateur’ louder than pages with dummy text.
Blog Articles – While pages are permanent and used for information that doesn’t change, you can use blog articles are for updates and changing viewpoints or new product intros.
Mailing List subscription – It’s important to stay in touch with your customers so create opportunities for people to leave their email address behind. You can send out a weekly or monthly newsletter with new product updates, behind the scenes stuff or any other way to engage with your audience.
Final step: Adding Products
In an online store you bunch together products in collections (Shopify) or product categories (Big Commerce ).
Each of these collections show as a menu item on the top of your website.
Adding products is easy: It’s often a matter of drag and drop. Just make sure you add nice photos and have an ALT text for each image (this helps with search engines).
Once you’ve completed this step your online shop is open for business! Make some test orders before you go live to make sure the whole process works.
Happy selling!
Ivanka
PS – I know I’ve missed some of the details but feel free to ask questions about your online store. Or share your experience with building your online store in a weekend. Can’t wait to hear your adventures!


